how to create your own site

Ellipstically Speaking

All of the references give a method, of drawing an ellipse, using the two foci and some string. I have found this method suitable only for drawing jelly bean or kidney shapes. Keeping the tension and hence the length of the string constant is problematic.

This method, based on the principle of the trammel, is IMHO much preferable. It requires a little more prep than the kidney method; but the results are uniformly true, exactly and rapidly repeatable, and the apparatus (constructed from scrap) can be used to draw any number of exactly concentric ellipses. There are two parts; the ellipstick and the track block.

Since I was doing this fairly often; I kept a stock of ellipstick blanks on hand. 8”- 24” lengths of scrap, with a scant 1/4” hole centered on the stock, at 1/2” from one end, with the center lines chased around the stick; and the mid-lines down its length. Best from the drill press. You'll be holding the pencil 3/4” away from the mark and out of plumb affects precision.
You can do the same thing with a notch in the end that will let you position the center of the pencil line at the exact end of the ellipstick. The object is to make the transfer of the critical measurements as simple and reliable as possible.

Mobirise

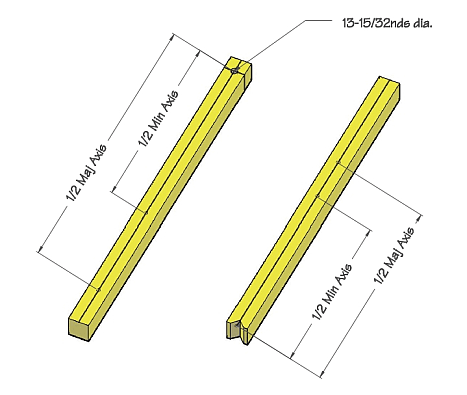
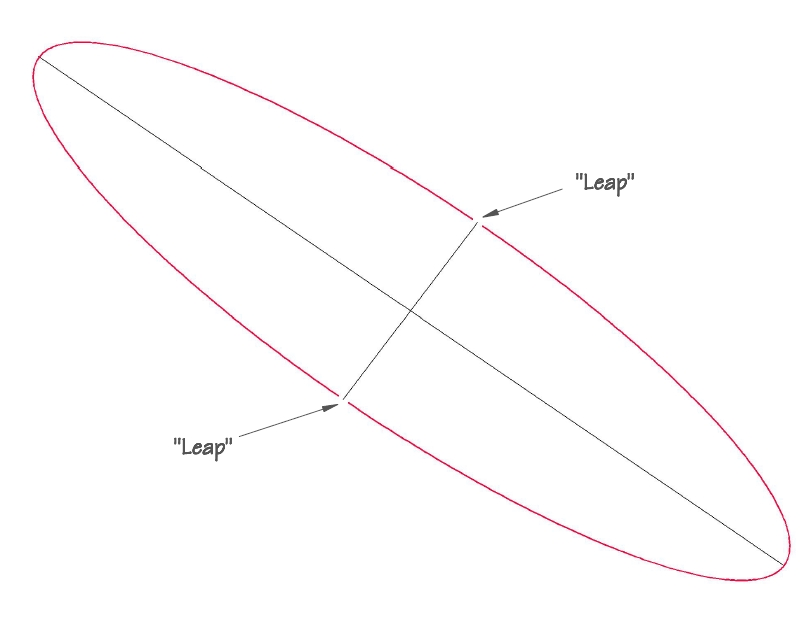
Next, a little 'rithmatic (ambition, distraction, uglification and derision). An ellipse is defined by its greatest extents, its major and minor axes (1 axis, 2 axes). An ellipse also has two foci (1 focus, 2 foci) Foci are the result of a mystical union between ½ the major axis; as an arc, struck from either terminus of the minor axis. Luckily we don't have to foc with either of them.

All we need to know is “what is ½ the major axis” and “what is ½ the minor axis.” If you've got numbers that are easy to measure, cool. If the numbers are wild; use the bisector gag to obtain precise measurements.) 

Transfer these to the ellipstick (each measured from the center of the pencil hole - why the hole is exactly 1/2" from the end.)

Drive a 4d finish nail straight into the ellipstick at each of those marks and clip off the heads leaving the pins just scant of 3/8” proud. Sweeten the ends with a kiss of a mill file.

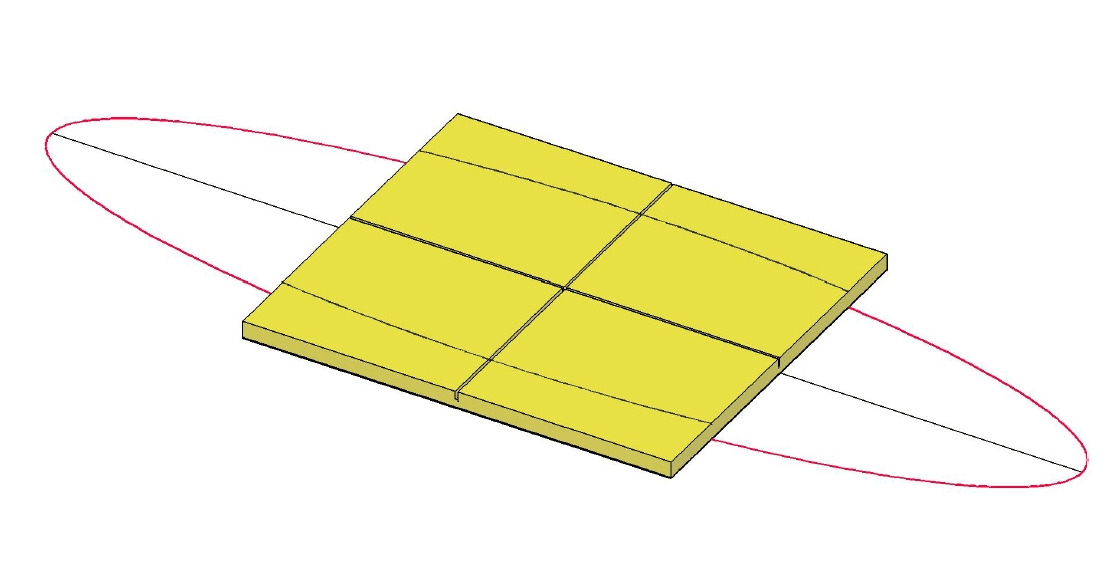
Mark out the major axis on the work or layout. Bisect that distance with a perpendicular on which you locate the minor axis.

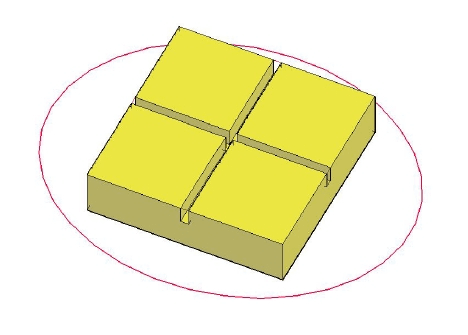
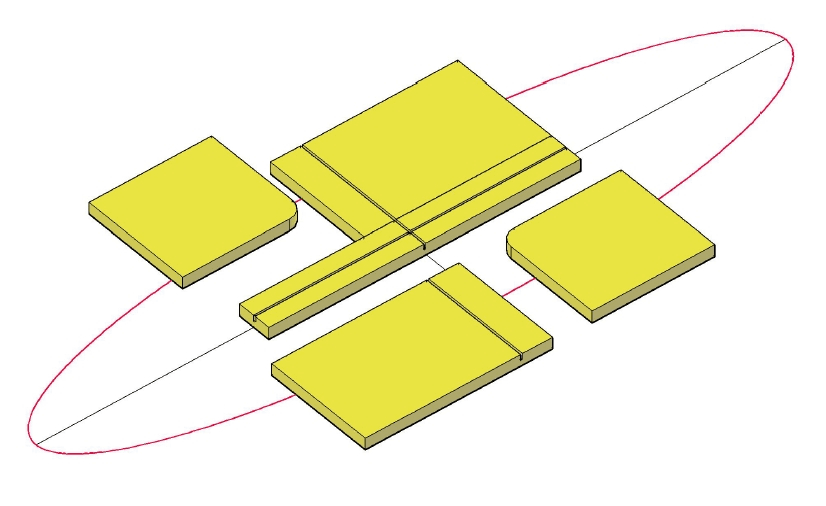
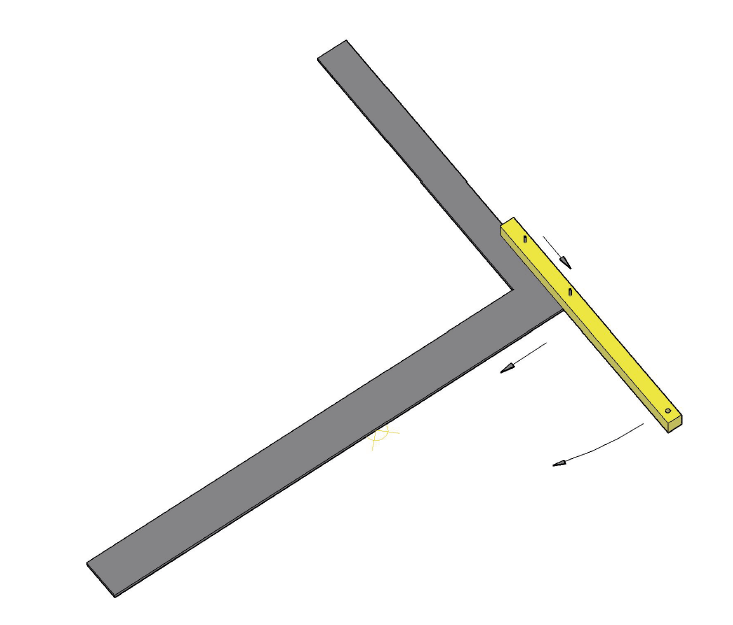
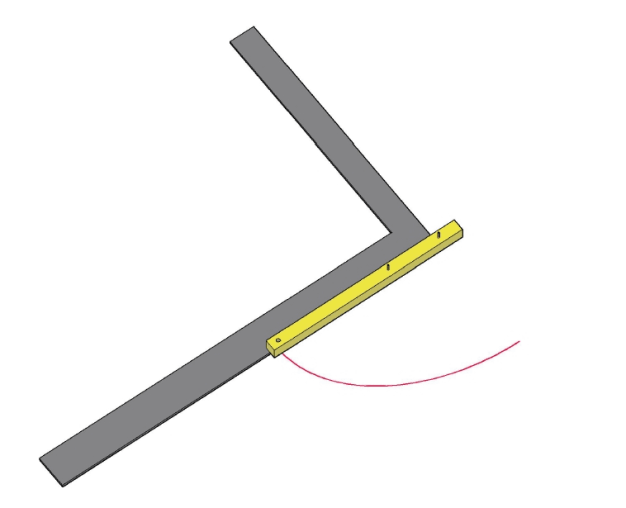
Next you need to construct the track block. This wants to begin as a true square piece of ¾ scrap, with no voids, that is twice the difference between ½ the major and ½ the minor axes +1/4”.

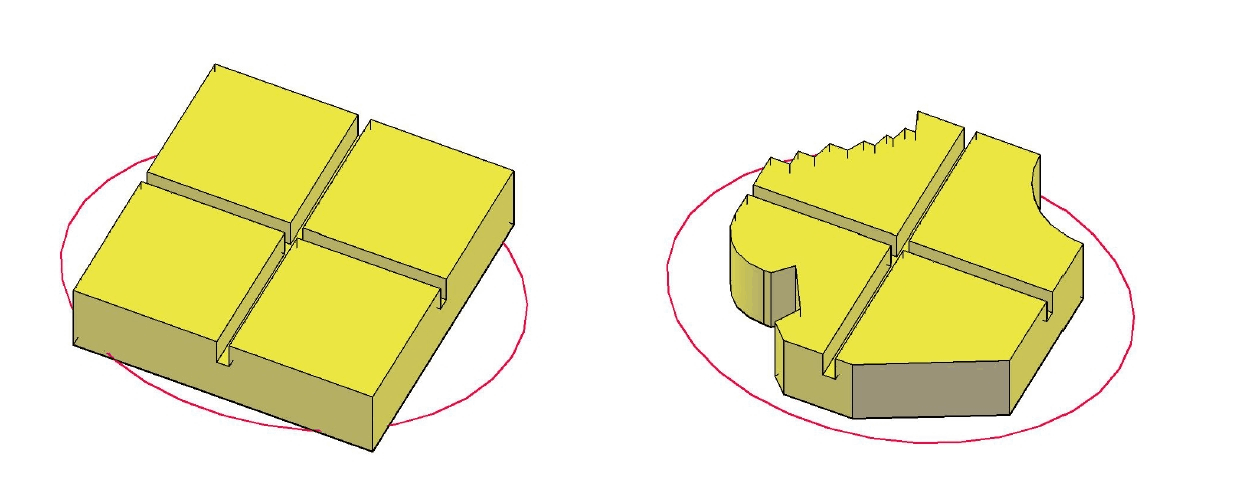
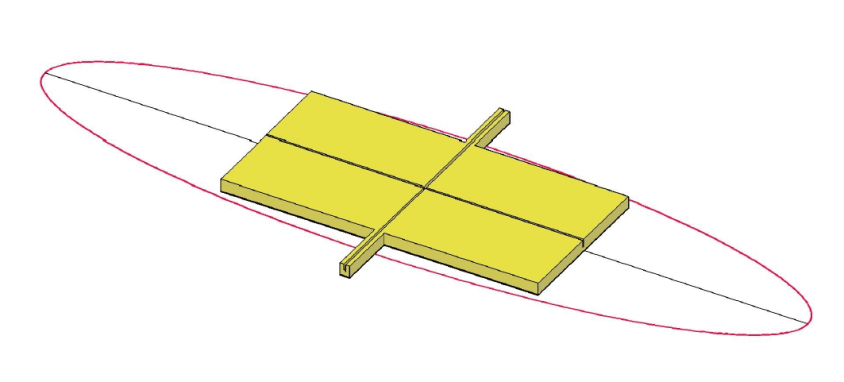
This done, lower the tablesaw blade so it only takes a 3/8”deep kerf and re-set the fence so the blade splits the two mid-lines of the square. You should end up with something that looks like this. 

Mobirise

 With your best try square mark the centers of the kerfs at the bottom of the block.
To set the block, line up the marks, under the kerf exits; with the major and minor axis layout lines. When all four are aligned; you're positioned perfectly.
Fasten the block in place on the layout. With one ellipstick "pin" in each kerf (and a pencil in the hole) strike the ellipse using the saw kerfs to guide the nails on the ellipstick.

This simple square block will work just fine where the ratio between the major and minor axes is 2:1 or less. (You can see it on the ellipstick or divide the lesser into the greater to get the exact ratio.)

As this ratio increases (the ellipse gets “flatter”) the corners of the square begin to intrude on your intended line. It is a simple matter to trim these to suit.

Mobirise
Mobirise


When the ratio climbs beyond 3:1, the difference becomes greater than ½ the minor axis; and more drastic action is required. 

Trace the path of the curve on the track block using the ellipstick.

Mobirise

You then have two choices.  You can trim to within 1/4” of the exit of the kerf from the block; leaving you a 5/8” gap (leap) at both ends of the minor axis (the flat side.)

This can be readily faired with some pins and a flexible strip.

Or, you can make the offending bits of track removable/replaceable.
Fit them back when needed and remove them when they're in the way. 

Mobirise

You can also use the ellipstick to strike ¼ of an ellipse against a flat square; and by repetition obtain a full ellipse. There are situations where this is simpler.

Shorten the nail heads to just scant the thickness of the square (no scratches)

Lay the outside edges along one of the four right angles produced by the intersection of Maj and Min. The ellipstick with the nail-heads riding against the square will describe ¼ of an ellipse.


The orbits of concentric ellipses are parallel. The same block in the same position will guide any concentric ellipse.  

With this device, as you increase the distance between the guide pins and the marking point you also change the ratio; making the ellipse less flat.

This technique can be scaled up very effectively using trammel points, or a custom built track and stick for very large radii.

You can also trammel a router or bayonet saw. Due to the forces involved it is best to add some sort of shoe to the pins as things get larger and electrified. There are a number of commercially made router jigs that work on this same principle.

Rockler

Black Jack

I built this whiz-bang out of basswood as a kid's toy to sell on eBay. The shoes and track are loose sliding dovetails. It draws the largest ellipse that will fit on a piece of letter sized paper leaving a half inch margin. But mostly it's soothing fun to just fiddle with it.

Mobirise
USPS

PO Box 14
Monticello, NY 12701-0014